注册功能
实现注册功能,先实现客户端发送post请求, 将注册ui中确定按钮改为sure_btn,并为其添加click槽函数
//day11 添加确认槽函数void RegisterDialog::on_sure_btn_clicked(){if(ui->user_edit->text() == ""){showTip(tr("用户名不能为空"), false);return;}if(ui->email_edit->text() == ""){showTip(tr("邮箱不能为空"), false);return;}if(ui->pass_edit->text() == ""){showTip(tr("密码不能为空"), false);return;}if(ui->confirm_edit->text() == ""){showTip(tr("确认密码不能为空"), false);return;}if(ui->confirm_edit->text() != ui->pass_edit->text()){showTip(tr("密码和确认密码不匹配"), false);return;}if(ui->varify_edit->text() == ""){showTip(tr("验证码不能为空"), false);return;}//day11 发送http请求注册用户QJsonObject json_obj;json_obj["user"] = ui->user_edit->text();json_obj["email"] = ui->email_edit->text();json_obj["passwd"] = ui->pass_edit->text();json_obj["confirm"] = ui->confirm_edit->text();json_obj["varifycode"] = ui->varify_edit->text();HttpMgr::GetInstance()->PostHttpReq(QUrl(gate_url_prefix+"/user_register"),json_obj, ReqId::ID_REG_USER,Modules::REGISTERMOD);}
再添加http请求回复后收到处理流程
void RegisterDialog::initHttpHandlers(){//...省略//注册注册用户回包逻辑_handlers.insert(ReqId::ID_REG_USER, [this](QJsonObject jsonObj){int error = jsonObj["error"].toInt();if(error != ErrorCodes::SUCCESS){showTip(tr("参数错误"),false);return;}auto email = jsonObj["email"].toString();showTip(tr("用户注册成功"), true);qDebug()<< "email is " << email ;});}
Server端接受注册请求
Server注册user_register逻辑
RegPost("/user_register", [](std::shared_ptr<HttpConnection> connection) {auto body_str = boost::beast::buffers_to_string(connection->_request.body().data());std::cout << "receive body is " << body_str << std::endl;connection->_response.set(http::field::content_type, "text/json");Json::Value root;Json::Reader reader;Json::Value src_root;bool parse_success = reader.parse(body_str, src_root);if (!parse_success) {std::cout << "Failed to parse JSON data!" << std::endl;root["error"] = ErrorCodes::Error_Json;std::string jsonstr = root.toStyledString();beast::ostream(connection->_response.body()) << jsonstr;return true;}//先查找redis中email对应的验证码是否合理std::string varify_code;bool b_get_varify = RedisMgr::GetInstance()->Get(src_root["email"].asString(), varify_code);if (!b_get_varify) {std::cout << " get varify code expired" << std::endl;root["error"] = ErrorCodes::VarifyExpired;std::string jsonstr = root.toStyledString();beast::ostream(connection->_response.body()) << jsonstr;return true;}if (varify_code != src_root["varifycode"].asString()) {std::cout << " varify code error" << std::endl;root["error"] = ErrorCodes::VarifyCodeErr;std::string jsonstr = root.toStyledString();beast::ostream(connection->_response.body()) << jsonstr;return true;}//访问redis查找bool b_usr_exist = RedisMgr::GetInstance()->ExistsKey(src_root["user"].asString());if (b_usr_exist) {std::cout << " user exist" << std::endl;root["error"] = ErrorCodes::UserExist;std::string jsonstr = root.toStyledString();beast::ostream(connection->_response.body()) << jsonstr;return true;}//查找数据库判断用户是否存在root["error"] = 0;root["email"] = src_root["email"];root ["user"]= src_root["user"].asString();root["passwd"] = src_root["passwd"].asString();root["confirm"] = src_root["confirm"].asString();root["varifycode"] = src_root["varifycode"].asString();std::string jsonstr = root.toStyledString();beast::ostream(connection->_response.body()) << jsonstr;return true;});
安装Mysql
先介绍Windows环境下安装mysql
点击mysql安装包下载链接:https://dev.mysql.com/downloads/mysql
选择window版本,点击下载按钮,如下所示
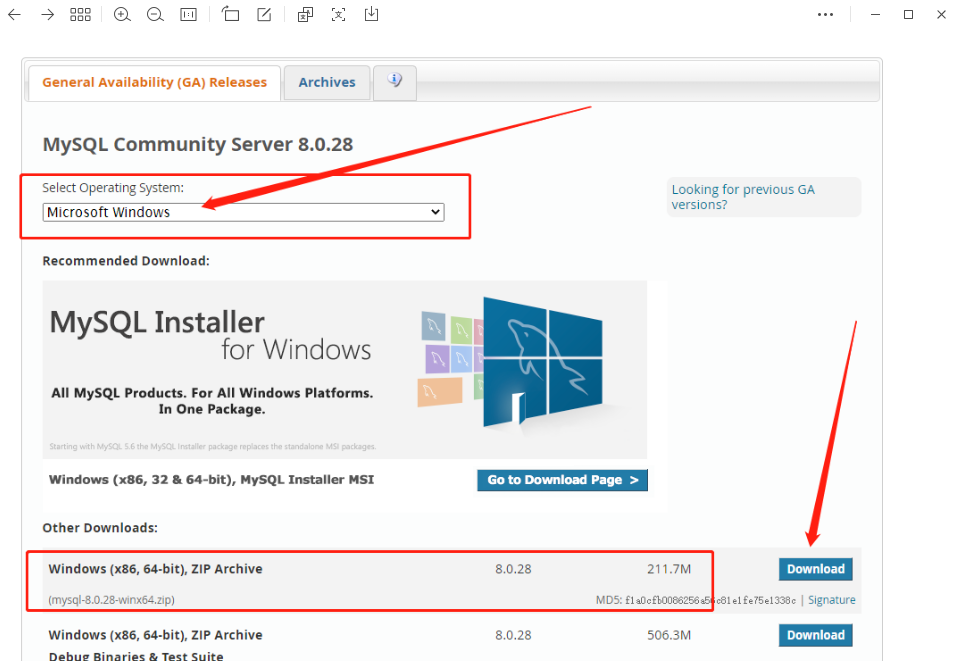
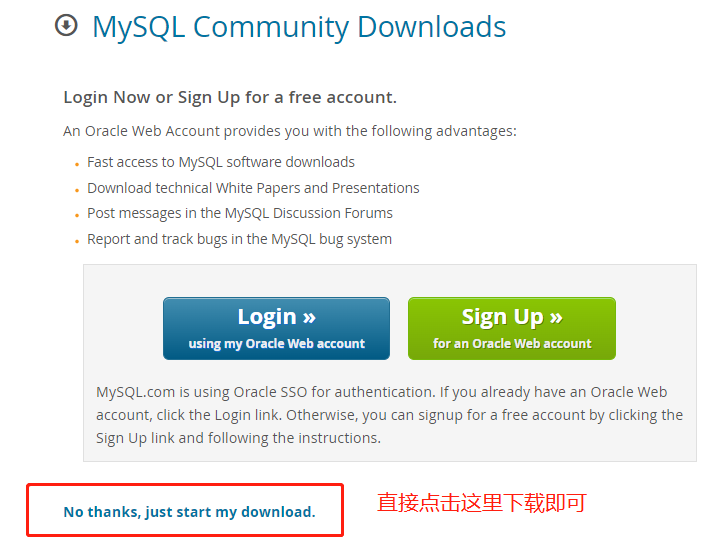
不用登录直接下载
下载好mysql安装包后,将其解压到指定目录,并记下解压的目录,后续用于环境变量配置
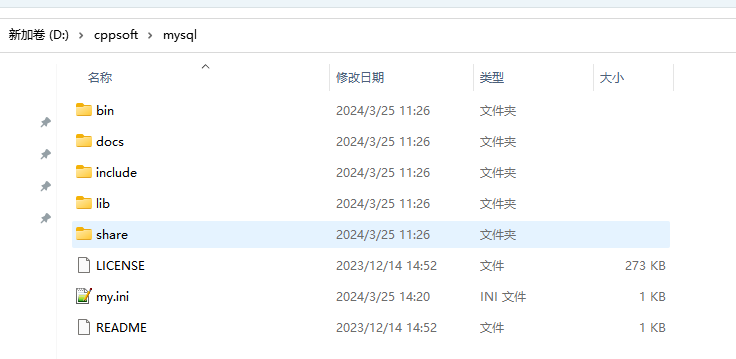
在bin目录同级下创建一个文件,命名为my.ini
编辑my.ini文件
[mysqld]# 设置3308端口port=3308# 设置mysql的安装目录 ---这里输入你安装的文件路径----basedir=D:\cppsoft\mysql# 设置mysql数据库的数据的存放目录datadir=D:\mysql\data# 允许最大连接数max_connections=200# 允许连接失败的次数。max_connect_errors=10# 服务端使用的字符集默认为utf8character-set-server=utf8# 创建新表时将使用的默认存储引擎default-storage-engine=INNODB# 默认使用“mysql_native_password”插件认证#mysql_native_passworddefault_authentication_plugin=mysql_native_password[mysql]# 设置mysql客户端默认字符集default-character-set=utf8[client]# 设置mysql客户端连接服务端时默认使用的端口port=3308default-character-set=utf8
有两点需要注意修改的:
A、basedir这里输入的是mysql解压存放的文件路径
B、datadir这里设置mysql数据库的数据存放目录
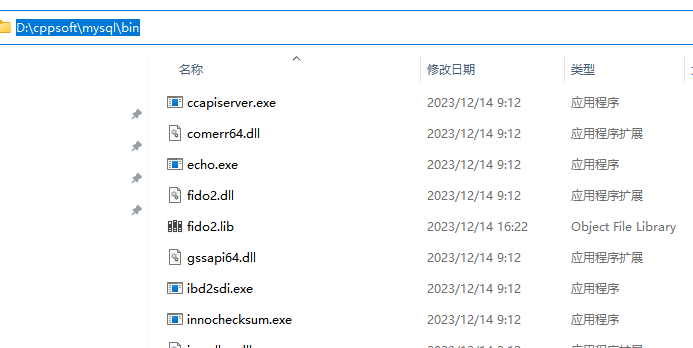
打开cmd进入mysql的bin文件下
依次执行命令
第一个命令为:
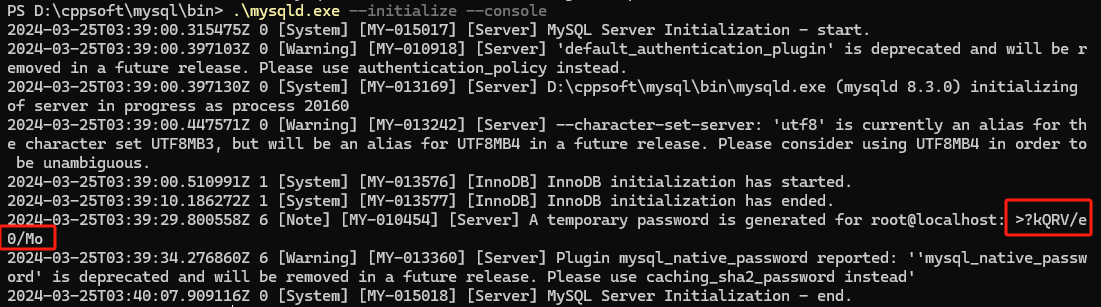
//安装mysql 安装完成后Mysql会有一个随机密码.\mysqld.exe --initialize --console
如下图,随机密码要记住,以后我们改密码会用到
接下来在cmd执行第二条命令
//安装mysql服务并启动.\mysqld.exe --install mysql
如果出现以下情况,说明cmd不是以管理员形式执行的,改用为管理员权限执行即可。

成功如下

目前为止安装完毕,大家如果mysql官网下载缓慢,可以去我的网盘下载
https://pan.baidu.com/s/1BTMZB31FWFUq4mZZdzcA9g?pwd=6xlz
提取码:6xlz
修改mysql密码
1 在本机启动mysql服务:
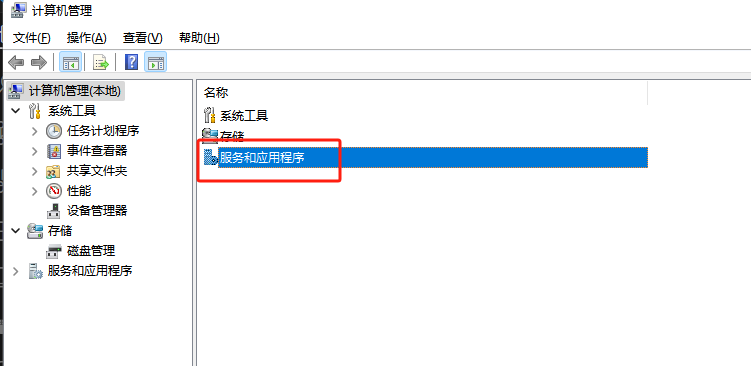
点击桌面我的电脑,右键选择管理进去:
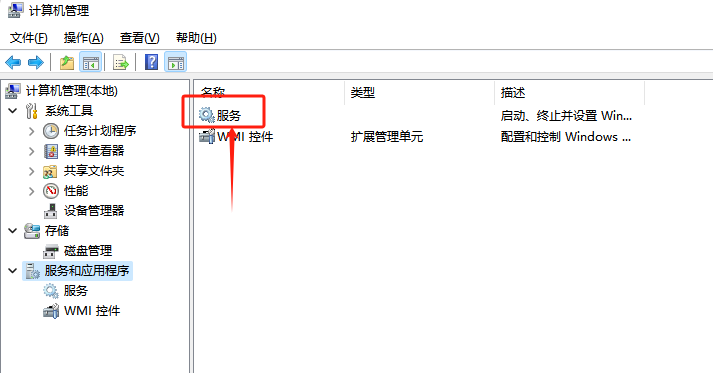
点击后选择服务
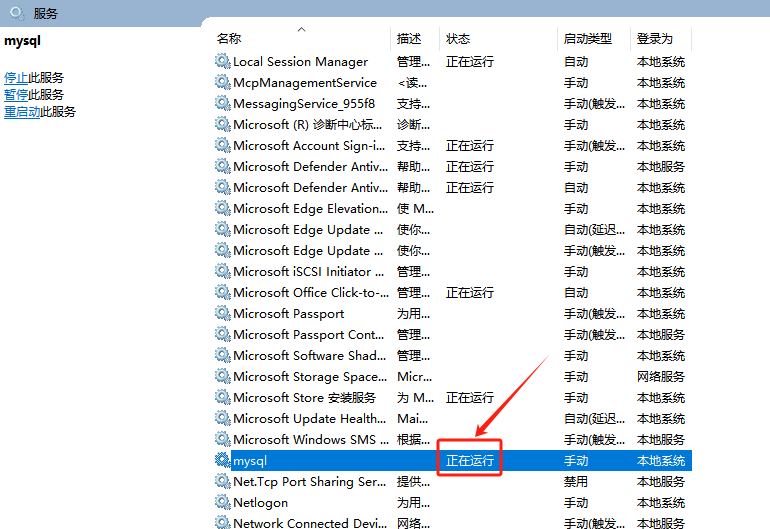
点击服务后可查看当前计算机启动的所有服务,找到mysql,然后右键点击设为启动,同时也可设置其为自动启动和手动启动
继续在cmd上执行以下命令
mysql -uroot -p
回车后输入上面安装时保存的初始密码,进入mysql里面:
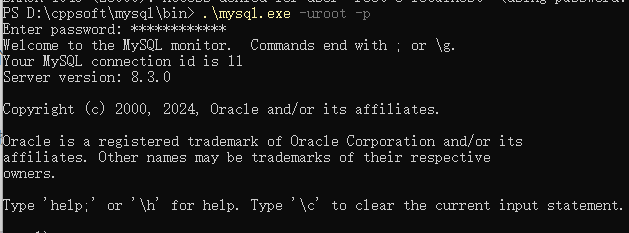
在mysql里面继续执行以下命令:
//修改密码为123mysqlALTER USER 'root'@'localhost' IDENTIFIED BY '123456';
回车按照指引执行完后,代表密码修改成功,再输入exit;退出即可
配置环境变量
为了方便使用mysql命令,可以将mysql目录配置在环境变量里
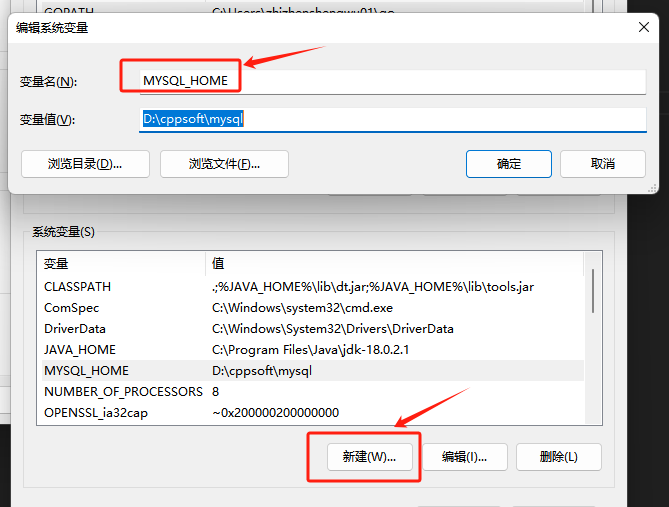
新建系统变量:
变量名:MYSQL_HOME
变量值:msql目录
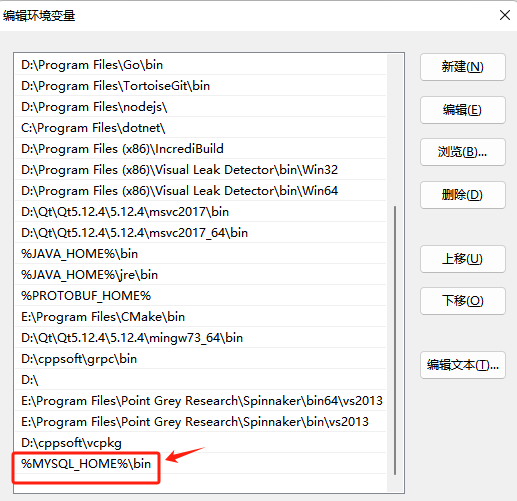
修改系统的path变量
编辑path,进去后添加 %MYSQL_HOME%\bin
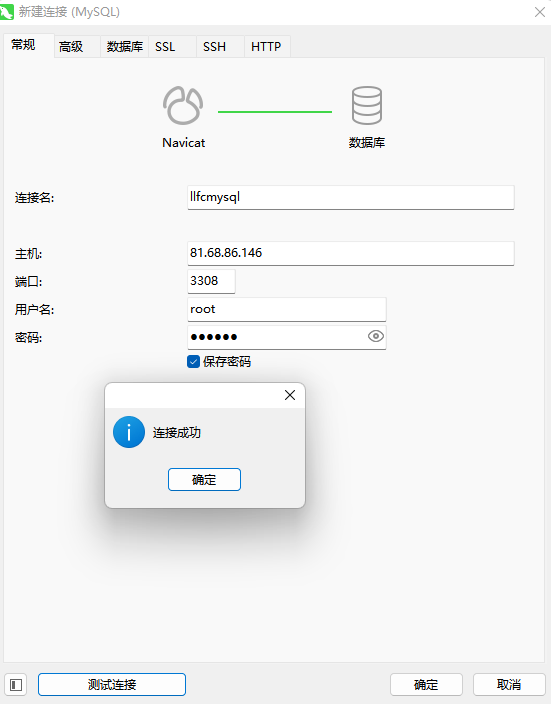
测试连接
为了方便测试,大家可以使用navicat等桌面工具测试连接。以后增删改查也方便。
可以去官网下载
或者我得网盘下载
https://pan.baidu.com/s/10jApYUrwaI19j345dpPGNA?pwd=77m2
验证码: 77m2
效果如下:
Docker环境配置mysql
拉取mysql镜像
docker pull mysql:8.0
先启动一个测试版本,然后把他的配置文件拷贝出来
docker run --name mysqltest \-p 3307:3306 -e MYSQL_ROOT_PASSWORD=root \-d mysql
创建三个目录,我得目录是
mkdir -p /home/zack/llfc/mysql/configmkdir -p /home/zack/llfc/mysql/datamkdir -p /home/zack/llfc/mysql/logs
进入docker中
docker exec -it mysqltest bash
之后可以通过搜寻找到配置在/etc/mysql/my.cnf
所以接下来退出容器,执行拷贝命令
docker cp mysqltest:/etc/mysql/my.cnf /home/zack/llfc/mysql/config
然后删除测试用的mysql docker
docker rm -f mysqltest
然后启动我们的容器
docker run --restart=on-failure:3 -d \-v /home/zack/llfc/mysql/config/my.cnf:/etc/mysql/my.cnf \-v /home/zack/llfc/mysql/data/:/var/lib/mysql \-v /home/zack/llfc/mysql/logs:/logs -p 3308:3306 \--name llfcmysql -e MYSQL_ROOT_PASSWORD=123456 mysql:8.0
设置远程访问
进入docker
docker exec -it llfcmysql bash
登录mysql
mysql -u root -p
设置允许远程访问,我不设置也能访问的,这里介绍一下。
use mysqlALTER USER 'root'@'%' IDENTIFIED WITH mysql_native_password BY '123456';flush privileges;
再次用navicat连接,是可以连接上了。
完善GateServer配置
添加Redis和Mysql配置
[Mysql]Host = 81.68.86.146Port = 3308Passwd = 123456[Redis]Host = 81.68.86.146Port = 6380Passwd = 123456
Mysql Connector C++
尽管Mysql提供了访问数据库的接口,但是都是基于C风格的,为了便于面向对象设计,我们使用Mysql Connector C++ 这个库来访问mysql。
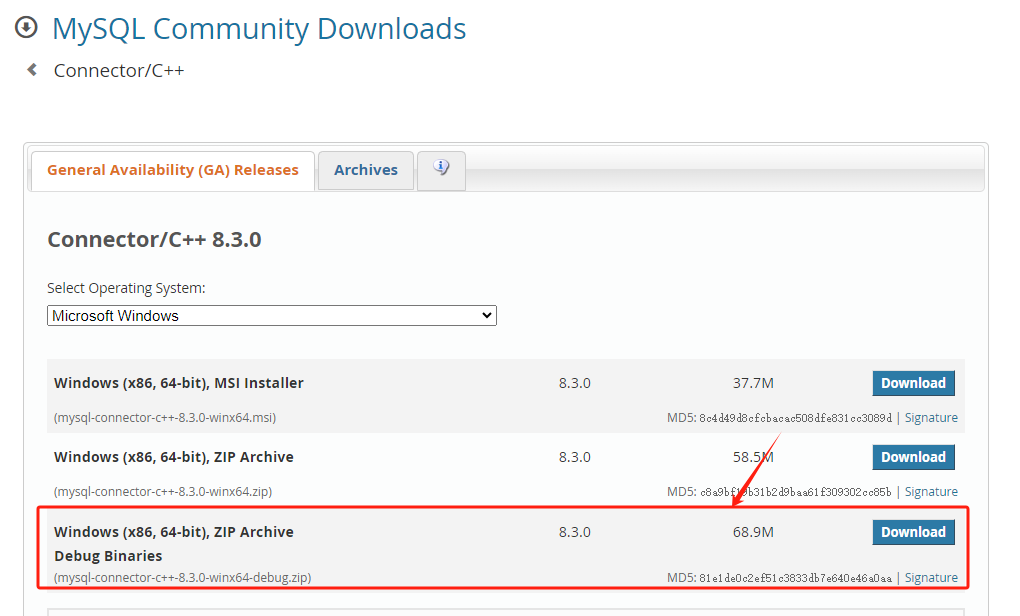
我们先安装这个库,因为我们windows环境代码是debug版本,所以下载connector的debug版本,如果你的开发编译用的release版本,那么就要下载releas版本,否则会报错terminate called after throwing an instance of 'std::bad_alloc'.
因为我在windows只做debug调试后期会将项目移植到Linux端,所以这里只下载debug版
下载地址
https://dev.mysql.com/downloads/connector/cpp/
如果下载缓慢可以去我的网盘下载
https://pan.baidu.com/s/1XAVhPAAzZpZahsyITua2oQ?pwd=9c1w
提取码:9c1w
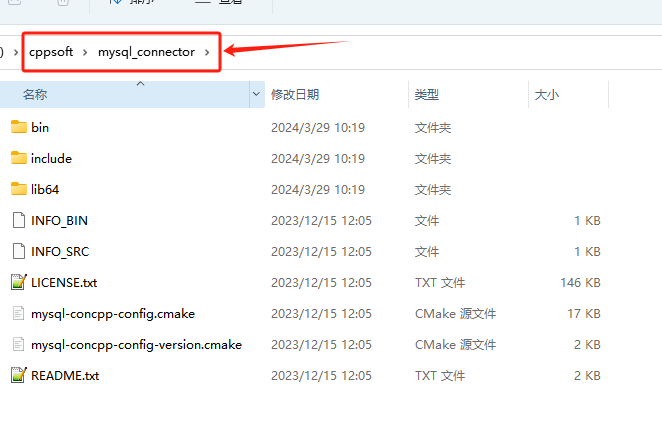
下载后将文件夹解压放在一个自己常用的目录,我放在D:\cppsoft\mysql_connector
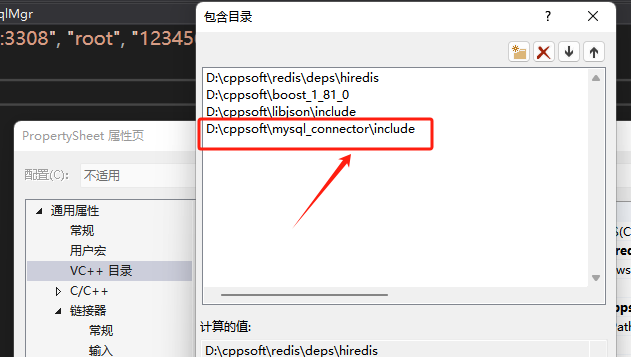
接下来去visual studio中配置项目
VC++ 包含目录添加D:\cppsoft\mysql_connector\include
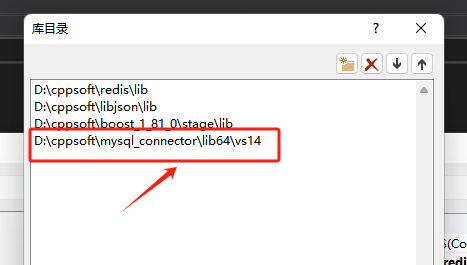
库目录包含D:\cppsoft\mysql_connector\lib64\vs14
然后将D:\cppsoft\mysql_connector\lib64\debug下的mysqlcppconn8-2-vs14.dll和mysqlcppconn9-vs14.dll分别拷贝到项目中
为了让项目自动将dll拷贝到运行目录,可以在生成事件->生成后事件中添加xcopy命令
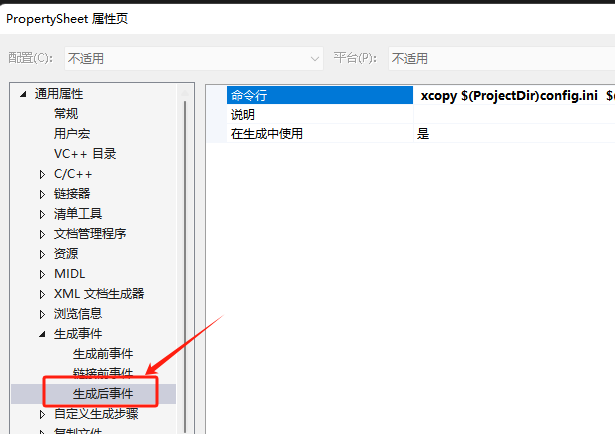
xcopy $(ProjectDir)config.ini $(SolutionDir)$(Platform)\$(Configuration)\ /yxcopy $(ProjectDir)*.dll $(SolutionDir)$(Platform)\$(Configuration)\ /y
封装mysql连接池
class MySqlPool {public:MySqlPool(const std::string& url, const std::string& user, const std::string& pass, const std::string& schema, int poolSize): url_(url), user_(user), pass_(pass), schema_(schema), poolSize_(poolSize), b_stop_(false){try {for (int i = 0; i < poolSize_; ++i) {sql::mysql::MySQL_Driver* driver = sql::mysql::get_mysql_driver_instance();std::unique_ptr<sql::Connection> con(driver->connect(url_, user_, pass_));con->setSchema(schema_);pool_.push(std::move(con));}}catch (sql::SQLException& e) {// 处理异常std::cout << "mysql pool init failed" << std::endl;}}std::unique_ptr<sql::Connection> getConnection() {std::unique_lock<std::mutex> lock(mutex_);cond_.wait(lock, [this] {if (b_stop_) {return true;}return !pool_.empty(); });if (b_stop_) {return nullptr;}std::unique_ptr<sql::Connection> con(std::move(pool_.front()));pool_.pop();return con;}void returnConnection(std::unique_ptr<sql::Connection> con) {std::unique_lock<std::mutex> lock(mutex_);if (b_stop_) {return;}pool_.push(std::move(con));cond_.notify_one();}void Close() {b_stop_ = true;cond_.notify_all();}~MySqlPool() {std::unique_lock<std::mutex> lock(mutex_);while (!pool_.empty()) {pool_.pop();}}private:std::string url_;std::string user_;std::string pass_;std::string schema_;int poolSize_;std::queue<std::unique_ptr<sql::Connection>> pool_;std::mutex mutex_;std::condition_variable cond_;std::atomic<bool> b_stop_;};
封装DAO操作层
类的声明
class MysqlDao{public:MysqlDao();~MysqlDao();int RegUser(const std::string& name, const std::string& email, const std::string& pwd);private:std::unique_ptr<MySqlPool> pool_;};
实现
MysqlDao::MysqlDao(){auto & cfg = ConfigMgr::Inst();const auto& host = cfg["Mysql"]["Host"];const auto& port = cfg["Mysql"]["Port"];const auto& pwd = cfg["Mysql"]["Passwd"];const auto& schema = cfg["Mysql"]["Schema"];const auto& user = cfg["Mysql"]["User"];pool_.reset(new MySqlPool(host+":"+port, user, pwd,schema, 5));}MysqlDao::~MysqlDao(){pool_->Close();}int MysqlDao::RegUser(const std::string& name, const std::string& email, const std::string& pwd){auto con = pool_->getConnection();try {if (con == nullptr) {pool_->returnConnection(std::move(con));return false;}// 准备调用存储过程unique_ptr < sql::PreparedStatement > stmt(con->prepareStatement("CALL reg_user(?,?,?,@result)"));// 设置输入参数stmt->setString(1, name);stmt->setString(2, email);stmt->setString(3, pwd);// 由于PreparedStatement不直接支持注册输出参数,我们需要使用会话变量或其他方法来获取输出参数的值// 执行存储过程stmt->execute();// 如果存储过程设置了会话变量或有其他方式获取输出参数的值,你可以在这里执行SELECT查询来获取它们// 例如,如果存储过程设置了一个会话变量@result来存储输出结果,可以这样获取:unique_ptr<sql::Statement> stmtResult(con->createStatement());unique_ptr<sql::ResultSet> res(stmtResult->executeQuery("SELECT @result AS result"));if (res->next()) {int result = res->getInt("result");cout << "Result: " << result << endl;pool_->returnConnection(std::move(con));return result;}pool_->returnConnection(std::move(con));return -1;}catch (sql::SQLException& e) {pool_->returnConnection(std::move(con));std::cerr << "SQLException: " << e.what();std::cerr << " (MySQL error code: " << e.getErrorCode();std::cerr << ", SQLState: " << e.getSQLState() << " )" << std::endl;return -1;}}
新建数据库llfc, llfc数据库添加user表和user_id表
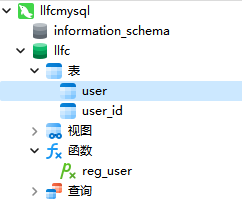
user表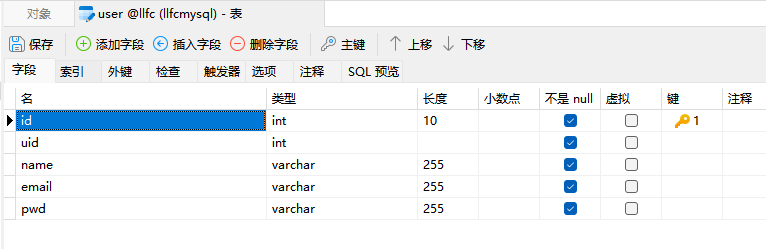
user_id就一行数据,用来记录用户id

这里id用简单计数表示,不考虑以后合服务器和分表分库,如果考虑大家可以采取不同的策略,雪花算法等。
新建存储过程
CREATE DEFINER=`root`@`%` PROCEDURE `reg_user`(IN `new_name` VARCHAR(255),IN `new_email` VARCHAR(255),IN `new_pwd` VARCHAR(255),OUT `result` INT)BEGIN-- 如果在执行过程中遇到任何错误,则回滚事务DECLARE EXIT HANDLER FOR SQLEXCEPTIONBEGIN-- 回滚事务ROLLBACK;-- 设置返回值为-1,表示错误SET result = -1;END;-- 开始事务START TRANSACTION;-- 检查用户名是否已存在IF EXISTS (SELECT 1 FROM `user` WHERE `name` = new_name) THENSET result = 0; -- 用户名已存在COMMIT;ELSE-- 用户名不存在,检查email是否已存在IF EXISTS (SELECT 1 FROM `user` WHERE `email` = new_email) THENSET result = 0; -- email已存在COMMIT;ELSE-- email也不存在,更新user_id表UPDATE `user_id` SET `id` = `id` + 1;-- 获取更新后的idSELECT `id` INTO @new_id FROM `user_id`;-- 在user表中插入新记录INSERT INTO `user` (`uid`, `name`, `email`, `pwd`) VALUES (@new_id, new_name, new_email, new_pwd);-- 设置result为新插入的uidSET result = @new_id; -- 插入成功,返回新的uidCOMMIT;END IF;END IF;END
数据库管理者
我们需要建立一个数据库管理者用来实现服务层,对接逻辑层的调用
#include "const.h"#include "MysqlDao.h"class MysqlMgr: public Singleton<MysqlMgr>{friend class Singleton<MysqlMgr>;public:~MysqlMgr();int RegUser(const std::string& name, const std::string& email, const std::string& pwd);private:MysqlMgr();MysqlDao _dao;};
实现
#include "MysqlMgr.h"MysqlMgr::~MysqlMgr() {}int MysqlMgr::RegUser(const std::string& name, const std::string& email, const std::string& pwd){return _dao.RegUser(name, email, pwd);}MysqlMgr::MysqlMgr() {}
逻辑层调用
在逻辑层注册消息处理。
RegPost("/user_register", [](std::shared_ptr<HttpConnection> connection) {auto body_str = boost::beast::buffers_to_string(connection->_request.body().data());std::cout << "receive body is " << body_str << std::endl;connection->_response.set(http::field::content_type, "text/json");Json::Value root;Json::Reader reader;Json::Value src_root;bool parse_success = reader.parse(body_str, src_root);if (!parse_success) {std::cout << "Failed to parse JSON data!" << std::endl;root["error"] = ErrorCodes::Error_Json;std::string jsonstr = root.toStyledString();beast::ostream(connection->_response.body()) << jsonstr;return true;}auto email = src_root["email"].asString();auto name = src_root["user"].asString();auto pwd = src_root["passwd"].asString();auto confirm = src_root["confirm"].asString();if (pwd != confirm) {std::cout << "password err " << std::endl;root["error"] = ErrorCodes::PasswdErr;std::string jsonstr = root.toStyledString();beast::ostream(connection->_response.body()) << jsonstr;return true;}//先查找redis中email对应的验证码是否合理std::string varify_code;bool b_get_varify = RedisMgr::GetInstance()->Get(CODEPREFIX+src_root["email"].asString(), varify_code);if (!b_get_varify) {std::cout << " get varify code expired" << std::endl;root["error"] = ErrorCodes::VarifyExpired;std::string jsonstr = root.toStyledString();beast::ostream(connection->_response.body()) << jsonstr;return true;}if (varify_code != src_root["varifycode"].asString()) {std::cout << " varify code error" << std::endl;root["error"] = ErrorCodes::VarifyCodeErr;std::string jsonstr = root.toStyledString();beast::ostream(connection->_response.body()) << jsonstr;return true;}//查找数据库判断用户是否存在int uid = MysqlMgr::GetInstance()->RegUser(name, email, pwd);if (uid == 0 || uid == -1) {std::cout << " user or email exist" << std::endl;root["error"] = ErrorCodes::UserExist;std::string jsonstr = root.toStyledString();beast::ostream(connection->_response.body()) << jsonstr;return true;}root["error"] = 0;root["uid"] = uid;root["email"] = email;root ["user"]= name;root["passwd"] = pwd;root["confirm"] = confirm;root["varifycode"] = src_root["varifycode"].asString();std::string jsonstr = root.toStyledString();beast::ostream(connection->_response.body()) << jsonstr;return true;});
再次启动客户端测试,可以注册成功