grpc简介
gRPC是Google开发的一种高性能、开源的远程过程调用(RPC)框架。它可以让客户端应用程序像调用本地服务一样轻松地调用远程服务,并提供了多种语言的支持,如C++、Java、Python、Go等。
gRPC使用Protocol Buffers作为数据格式,可以在不同的平台上进行应用程序之间的通信,支持多种编程语言和多种操作系统。它采用基于HTTP/2的协议,提供了高效、快速且可扩展的远程调用功能,并带有负载均衡、认证、监控等功能,方便用户管理和维护分布式系统。
gRPC可用于构建各种类型的分布式应用程序,如微服务、云原生应用程序、大规模Web应用程序、移动应用程序等场景。由于其高性能和可扩展性,越来越多的企业和组织开始采用gRPC来构建他们的应用程序和服务。
grpc下载
由于国内环境,grpc下载极其困难,grpc项目在github上,源码地址为https://github.com/grpc/grpc,我们可以通过如下命令克隆grpc源码进行编译
git clone https://github.com/grpc/grpc.gitgit submodule update --init
但是国内网络环境执行submodule update时会失败,所以可以用国内的代码管理工具gitee进行克隆。
注意,目前在Gitee上只能找到gRPC依赖的部分”官方”镜像仓库,网友提供的镜像仓库较旧,因而只能构造v1.34.0版本.通过上述指令可以将v1.34.0版本的gRPC代码下载到grpc目录.
我们选择一个稳定的分支进行克隆
git clone -b v1.34.0 https://gitee.com/mirrors/grpc-framework.git grpc
克隆之后,我们进入grpc文件夹,修改.gitmodules内仓库地址,修改前.gitmodules内容是这样的
[submodule "third_party/zlib"]path = third_party/zlib#url = https://github.com/madler/zliburl = https://gitee.com/mirrors/zlib.git# When using CMake to build, the zlib submodule ends up with a# generated file that makes Git consider the submodule dirty. This# state can be ignored for day-to-day development on gRPC.ignore = dirty[submodule "third_party/protobuf"]path = third_party/protobuf#url = https://github.com/google/protobuf.giturl = https://gitee.com/local-grpc/protobuf.git[submodule "third_party/googletest"]path = third_party/googletest#url = https://github.com/google/googletest.giturl = https://gitee.com/local-grpc/googletest.git[submodule "third_party/benchmark"]path = third_party/benchmark#url = https://github.com/google/benchmarkurl = https://gitee.com/mirrors/google-benchmark.git[submodule "third_party/boringssl-with-bazel"]path = third_party/boringssl-with-bazel#url = https://github.com/google/boringssl.giturl = https://gitee.com/mirrors/boringssl.git[submodule "third_party/re2"]path = third_party/re2#url = https://github.com/google/re2.giturl = https://gitee.com/local-grpc/re2.git[submodule "third_party/cares/cares"]path = third_party/cares/cares#url = https://github.com/c-ares/c-ares.giturl = https://gitee.com/mirrors/c-ares.gitbranch = cares-1_12_0[submodule "third_party/bloaty"]path = third_party/bloaty#url = https://github.com/google/bloaty.giturl = https://gitee.com/local-grpc/bloaty.git[submodule "third_party/abseil-cpp"]path = third_party/abseil-cpp#url = https://github.com/abseil/abseil-cpp.giturl = https://gitee.com/mirrors/abseil-cpp.gitbranch = lts_2020_02_25[submodule "third_party/envoy-api"]path = third_party/envoy-api#url = https://github.com/envoyproxy/data-plane-api.giturl = https://gitee.com/local-grpc/data-plane-api.git[submodule "third_party/googleapis"]path = third_party/googleapis#url = https://github.com/googleapis/googleapis.giturl = https://gitee.com/mirrors/googleapis.git[submodule "third_party/protoc-gen-validate"]path = third_party/protoc-gen-validate#url = https://github.com/envoyproxy/protoc-gen-validate.giturl = https://gitee.com/local-grpc/protoc-gen-validate.git[submodule "third_party/udpa"]path = third_party/udpa#url = https://github.com/cncf/udpa.giturl = https://gitee.com/local-grpc/udpa.git[submodule "third_party/libuv"]path = third_party/libuv#url = https://github.com/libuv/libuv.giturl = https://gitee.com/mirrors/libuv.git
gRPC的依赖是通过git的submodules来关联的,代码下载下来之后可以看到.gitmodules文件,内部的git仓库地址都需要替换成Gitee的,例如:
[submodule "third_party/zlib"]path = third_party/zliburl = https://github.com/madler/zlib# When using CMake to build, the zlib submodule ends up with a# generated file that makes Git consider the submodule dirty. This# state can be ignored for day-to-day development on gRPC.ignore = dirty
使用了zlib,在Gitee上搜索其代码仓库为https://gitee.com/mirrors/zlib,可以使用如下指令clone:
git clone https://gitee.com/mirrors/zlib.git
因而替换成:
[submodule "third_party/zlib"]path = third_party/zlib#url = https://github.com/madler/zliburl = https://gitee.com/mirrors/zlib.git# When using CMake to build, the zlib submodule ends up with a# generated file that makes Git consider the submodule dirty. This# state can be ignored for day-to-day development on gRPC.ignore = dirty
通过这种方法可以找到部分依赖库的最新镜像仓库,但是有一些找不到最新的,例如protobuf等库,用户local-grpc提供了gRPC依赖的全部代码仓库,可以使用这些仓库(注意代码不是同步镜像,导致gRPC只能构造相应版本),其中protobuf链接为:
https://gitee.com/local-grpc/protobuf.git
这里将.gitmodules修改为如下内容即可:
[submodule "third_party/zlib"]path = third_party/zlib#url = https://github.com/madler/zliburl = https://gitee.com/mirrors/zlib.git# When using CMake to build, the zlib submodule ends up with a# generated file that makes Git consider the submodule dirty. This# state can be ignored for day-to-day development on gRPC.ignore = dirty[submodule "third_party/protobuf"]path = third_party/protobuf#url = https://github.com/google/protobuf.giturl = https://gitee.com/local-grpc/protobuf.git[submodule "third_party/googletest"]path = third_party/googletest#url = https://github.com/google/googletest.giturl = https://gitee.com/local-grpc/googletest.git[submodule "third_party/benchmark"]path = third_party/benchmark#url = https://github.com/google/benchmarkurl = https://gitee.com/mirrors/google-benchmark.git[submodule "third_party/boringssl-with-bazel"]path = third_party/boringssl-with-bazel#url = https://github.com/google/boringssl.giturl = https://gitee.com/mirrors/boringssl.git[submodule "third_party/re2"]path = third_party/re2#url = https://github.com/google/re2.giturl = https://gitee.com/local-grpc/re2.git[submodule "third_party/cares/cares"]path = third_party/cares/cares#url = https://github.com/c-ares/c-ares.giturl = https://gitee.com/mirrors/c-ares.gitbranch = cares-1_12_0[submodule "third_party/bloaty"]path = third_party/bloaty#url = https://github.com/google/bloaty.giturl = https://gitee.com/local-grpc/bloaty.git[submodule "third_party/abseil-cpp"]path = third_party/abseil-cpp#url = https://github.com/abseil/abseil-cpp.giturl = https://gitee.com/mirrors/abseil-cpp.gitbranch = lts_2020_02_25[submodule "third_party/envoy-api"]path = third_party/envoy-api#url = https://github.com/envoyproxy/data-plane-api.giturl = https://gitee.com/local-grpc/data-plane-api.git[submodule "third_party/googleapis"]path = third_party/googleapis#url = https://github.com/googleapis/googleapis.giturl = https://gitee.com/mirrors/googleapis.git[submodule "third_party/protoc-gen-validate"]path = third_party/protoc-gen-validate#url = https://github.com/envoyproxy/protoc-gen-validate.giturl = https://gitee.com/local-grpc/protoc-gen-validate.git[submodule "third_party/udpa"]path = third_party/udpa#url = https://github.com/cncf/udpa.giturl = https://gitee.com/local-grpc/udpa.git[submodule "third_party/libuv"]path = third_party/libuv#url = https://github.com/libuv/libuv.giturl = https://gitee.com/mirrors/libuv.git
使用如下指令拉取gRPC所有依赖:
cd grpcgit submodule update --init
编译grpc
CMake安装
为了编译grpc,我们需要下载cmake,cmake是一个跨平台编译工具,在之前我们编译protobuf时已经下载过了,这里再次介绍一下
CMake是一个跨平台的开源构建工具,可以用于自动化构建、测试和打包C++代码。与其他构建工具相比,CMake的优点之一是它的配置文件具有可读性和可维护性,而且支持多种编译器、操作系统和构建工具。
我们要在windows上生成protobuf对应的库,就需要用到cmake。
官方下载地址https://cmake.org/download/, 选择Windows Source下载。
由于官方下载较慢,可以去我的网盘下载
https://pan.baidu.com/s/1Yg9Usdc3T-CYhyr9GiePCw?pwd=ng6x
验证码ng6x
NASM
编译grpc需要准备nasm,所以也要下载nasm, 下载地址为https://www.nasm.us/,点击下载指定版本,安装即可,记得安装后把安装的路径配置在环境变量里,我的装载了C盘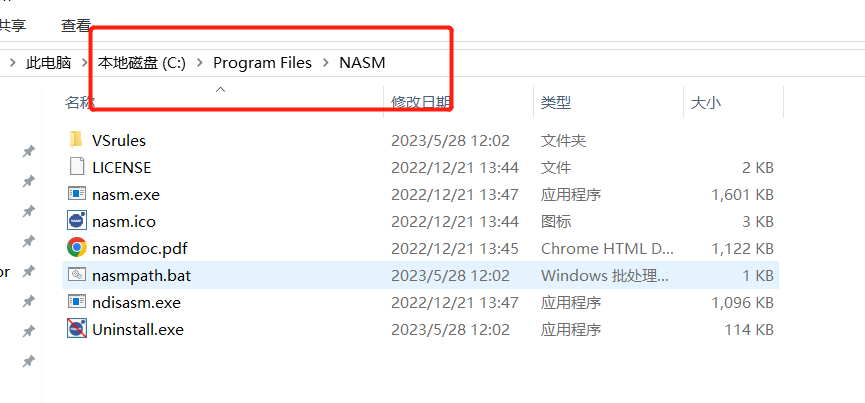
环境变量配置如下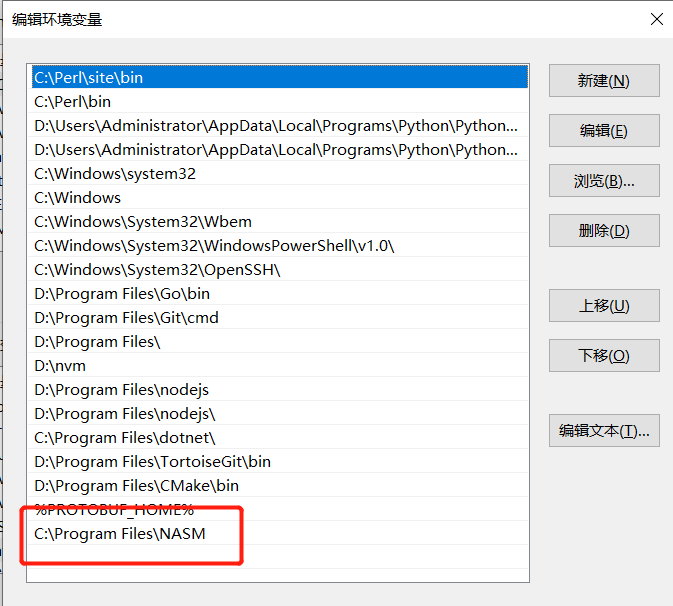
有部分博主说要安装go和perl,我感觉不需要,但是我的电脑里确实有开发环境,这里还是告诉大家如何安装go和Perl
Go安装
windows环境下下载go,地址https://studygolang.com/dl。
选择我们对应系统的安装包下载即可。一路下载安装,最后go会自动写入我们的环境变量。
Linux可以选择手动安装二进制包再配置环境变量。
安装好后,因为go的库包默认在外网,下载很慢,所以要切换代理
go env -w GOPROXY=https://goproxy.cn,direct # 设置代理,国内网络开启
Perl安装
Perl安装可以去官网下载https://www.activestate.com/products/perl/,并按照提示一步步安装,也可以去网盘下载,直接安装,网盘地址https://pan.baidu.com/s/1i3GLKAp
编译grpc
接下来我们需要用CMake编译grpc来生成我们需要的visual studio 项目
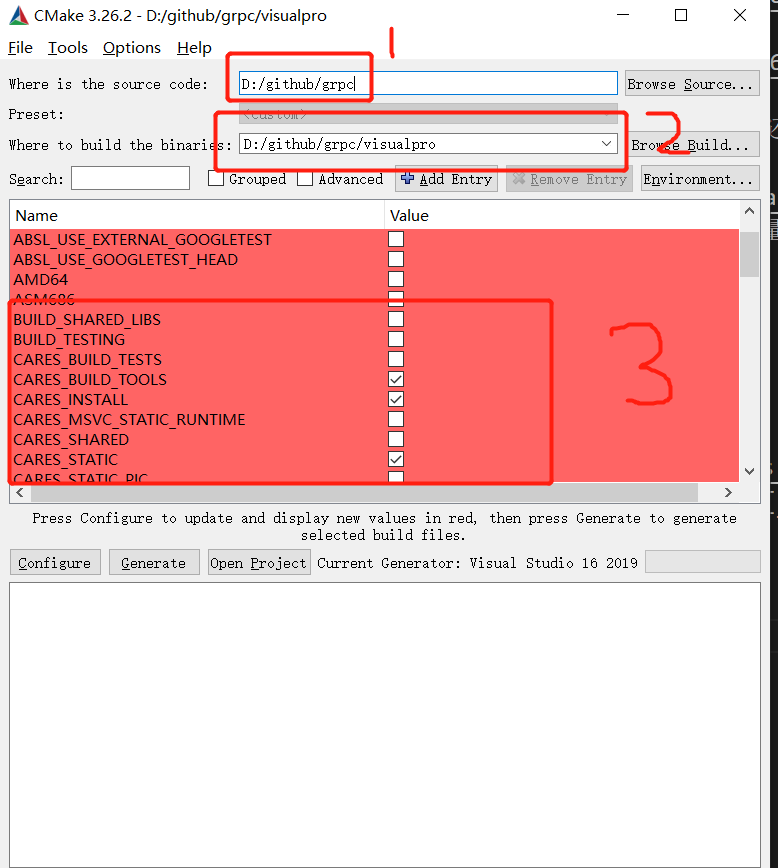
1是grpc源码目录
2是grpc生成的visual studio项目目录
3 是我们要生成哪些项目。
我们先点击啊config进行配置,此时弹出对话框,我的visual studio版本是2019的, 所以我选择编译生成visual studio2019的工程。
接下来点击generate生成项目,大约几分钟可以生成,生成成功后我们点击open project打开工程,此时就是用visual sutido 2019打开grpc工程了。
接下来我们设置编译平台为64位,选择Debug模式,这里大家尽量编译Release版,Release版压缩的更好一点。
选择All项目进行全量编译,编译后就可以在Debug或Release文件夹找到对应生成的库文件和exe了。
总结
本文介绍了windows环境下如何配置grpc项目和编译生成我们需要的库。
如果大家还是不能顺利生成编译所需的库,可以用我的,这个源码在linux和windows都能用,源码包括第三方库都下载好了,网盘地址:
https://pan.baidu.com/s/1BBaAZ8-R-GSxxcy2s7TRWA?pwd=ybno
提取码:ybno